
Inboxes vs Help Desks
HubSpot uses Inboxes and Help Desks to organize these communications. While both look very similar they have distinct differences.
Inboxes 101
To Find Inboxes use the left hand navigation panel CRM>Inbox as seen below. It is best practice to bookmark this item:
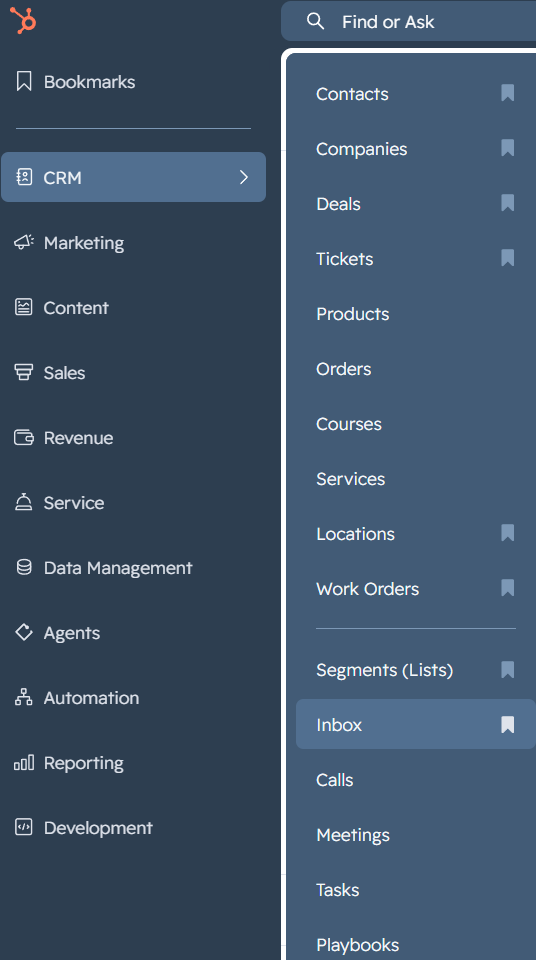
Inboxes mirror email inboxes that are connected to HubSpot. At our franchise, we have the Estimating_114 and Scheduling_114 Google accounts set up as inboxes in HubSpot. It is important to note that HubSpot refers to the communications in the inbox as Conversations.
Inbox Conversation Conversions
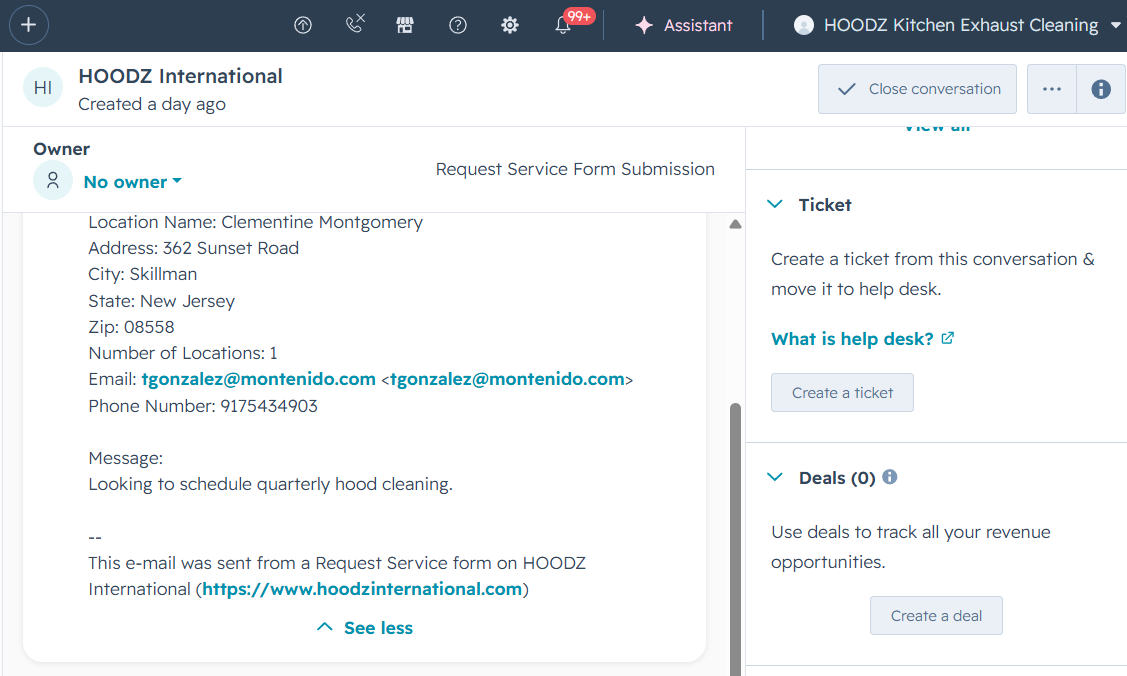
If an Inbox conversation prompts an internal action, we have the ability to convert it to different HubSpot objects. The most common case will be converting conversations to Tickets or Deals. Once a Conversation is open, the right panel has cards for easy conversions as seen in the picture below. Follow the prompt using the native HubSpot workflow to complete the conversion. Please note these items need to be associated with a Contact, Location, and Company for client continuity and team transparency.
Help Desk 101
To Find Help Desks use the left hand Navigation Pane> Service>Help Desk as seen below. It is best practice to bookmark this item:
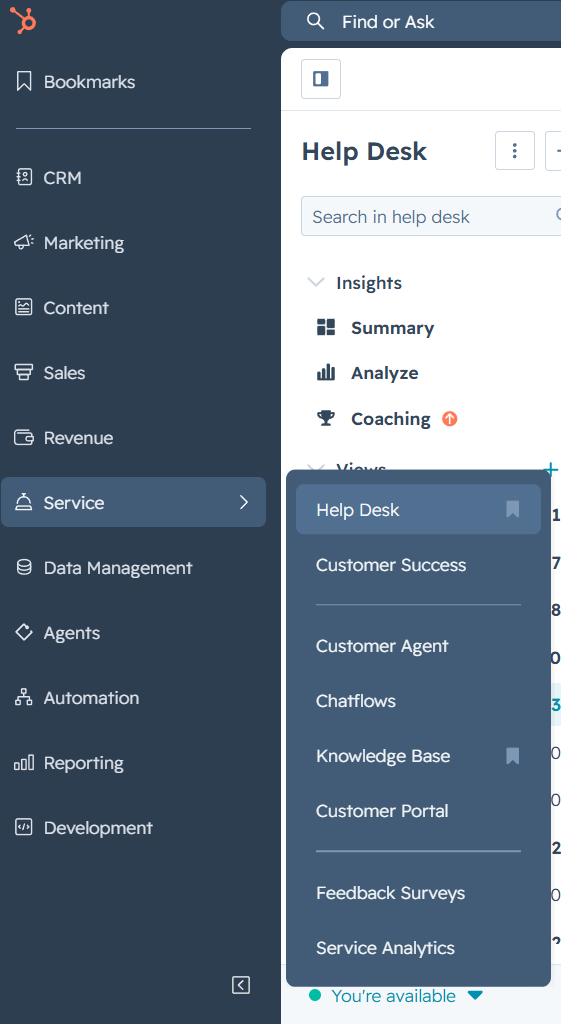
Help Desk mirrors email inboxes or other data channels that are connected to HubSpot. At our franchise, we have the Support_114 and Billing_114 Google accounts, AirCall, the event form generator set up as channels that feed in our HubSpot Help Desks. It is important to note that HubSpot creates all inbound data feeds into Tickets.
Help Desk Actions and FAQs
Help Desk Ticket Handling: Associating, Merging, and HS Native Ticket Creation
Tickets in the Help Desk can require various actions depending on the ticket type and the channel it was received. Emails received into a Help Desk as logged using the email subject as the name of the ticket. If a client or Customer Service Rep forwards the email to a new recipient and they reply all, a net-new ticket will be created because the subject line has changed. In this instance the ticket needs to be merged.
Merging Tickets
Open the ticket to view all ticket properties. Select the Actions dropdown and click Merge as seen in the picture below:
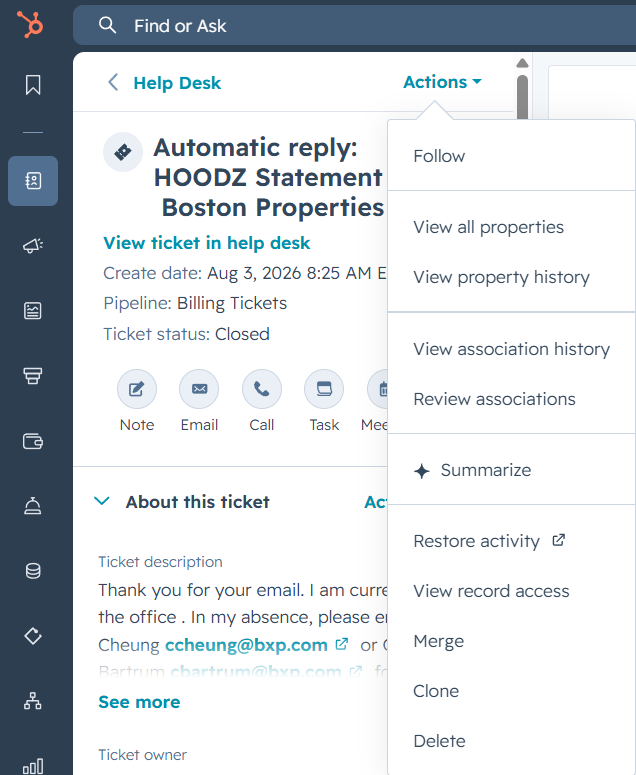
This selects the ticket you have open and allows you to pick the ticket you would like to merge it with using a dropdown. Please reference the picture below as an example:
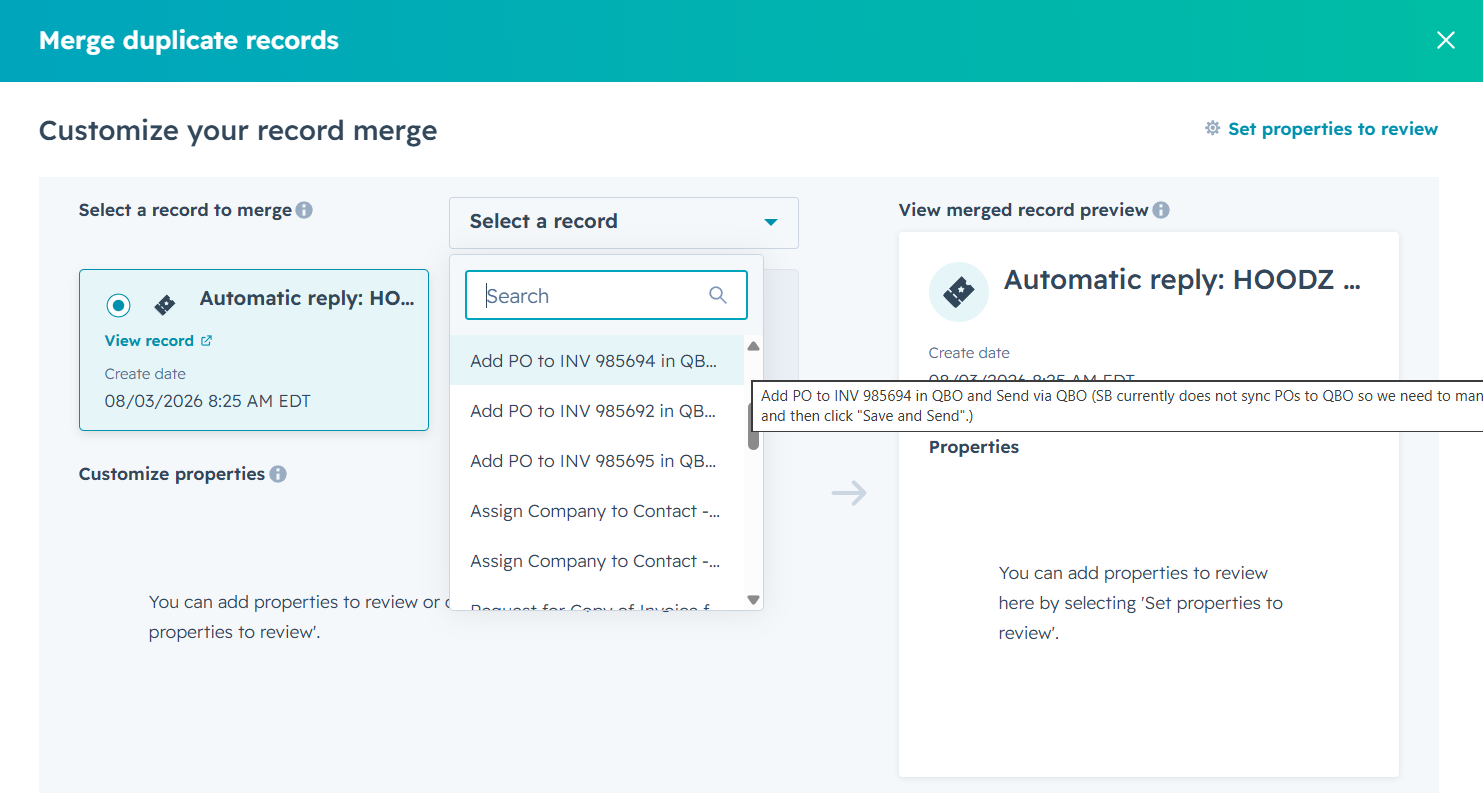
Once you merge records, this can't be undone.
- For any properties not specified, the primary record's values will be used in the final record.
- All associated records of both records included in the merge will appear on the new record.
- All timeline activities of both records included in the merge will appear on the new record.
- The records included in the merge will be unenrolled from all workflows. To allow merged records to enter a workflow due to data changes during the merge, adjust your workflow settings.
- The resulting record will have a new Record ID, but the Record IDs of the merged records will still be accessible.
Adding Associations
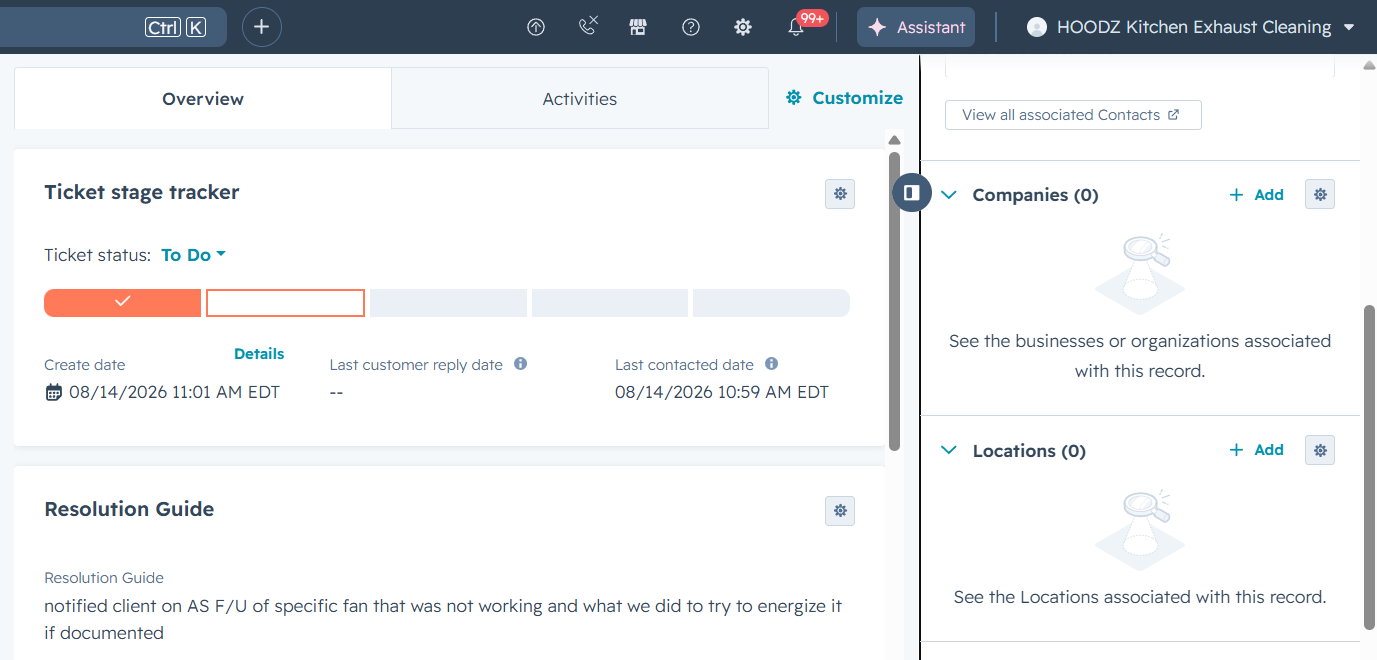
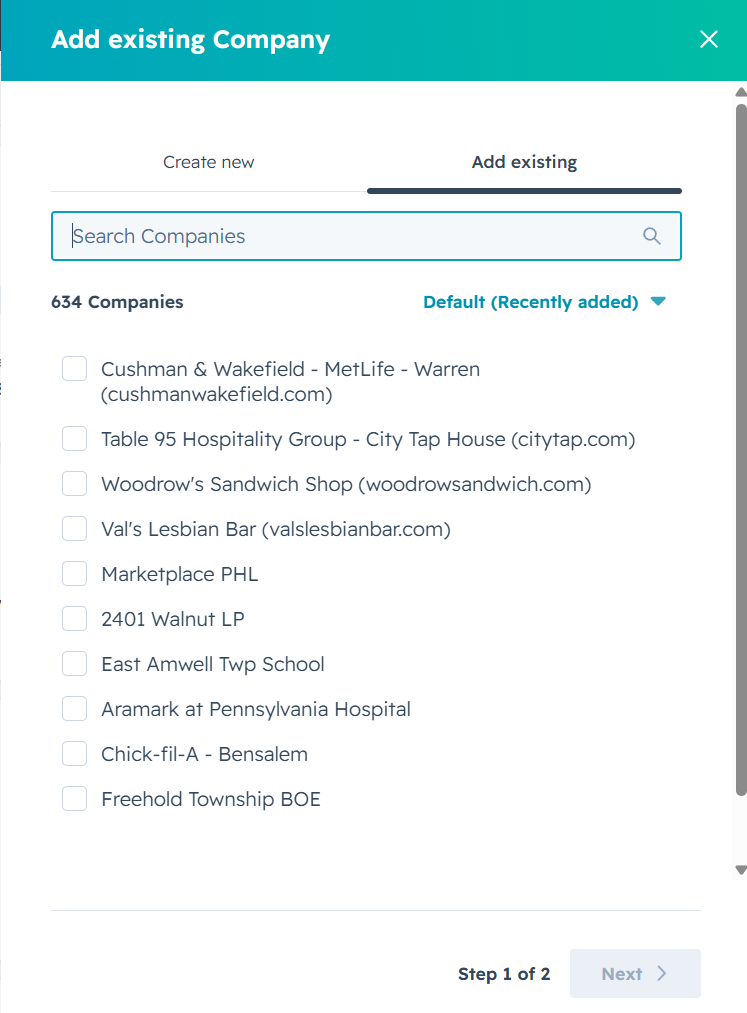
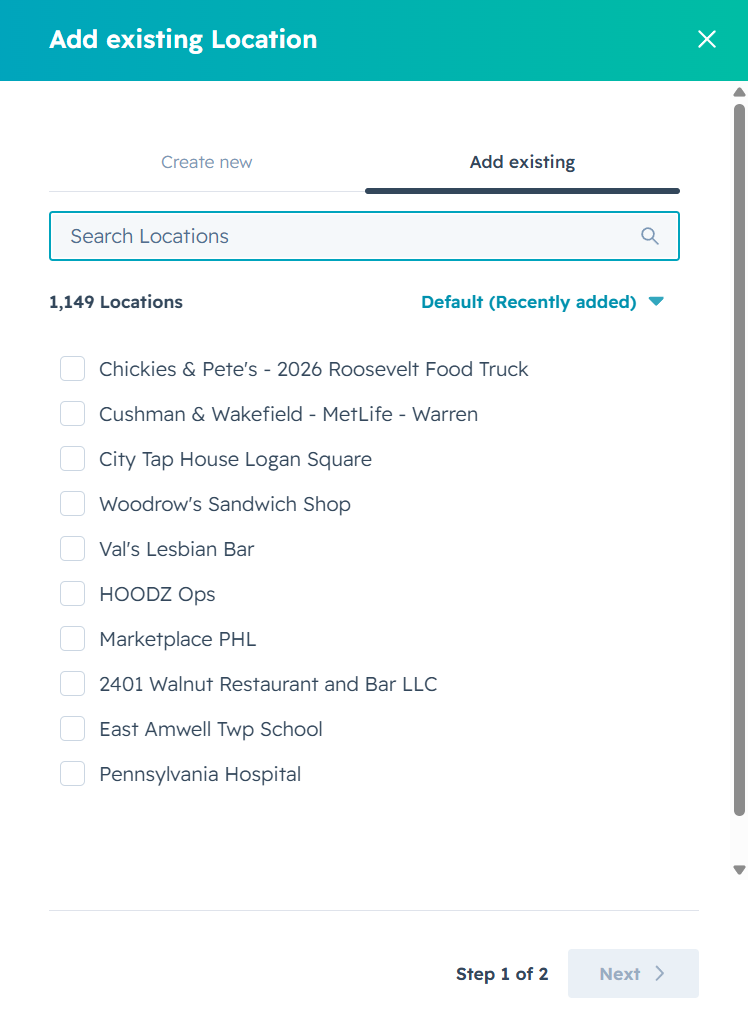
For AirCall tickets, you may need to associate a company, location, or contact to the ticket for tracking purposes. Similar to merging, open the ticket in its full view and scroll down on the right panel to Company and Location. Click “+ Add” in their respective cards, select the Company or Location from “Add existing”, click Next and Save as seen below.
Once a ticket has a Company and Location associated with it, use the Customer Portal to update any contact details with the new AirCall number. Once the person is updated in the Customer Portal, you can assign them to the ticket for future reference.
HubSpot Native Ticket Creation
If a ticket needs to be created organically, we can use the orange Create Ticket button found in the top right of any ticketing queue as seen below:

Follow the user-friendly prompt by naming the ticket properly. It is best practice to use an identifier like the Company, Location, or event we are now tracking in the ticket. It is also important to be mindful of where this ticket can be found after creation by selecting the proper Pipeline.